PortfolioSite

djwiley912.weebly.com

Sunday, April 23, 2017

Magic the Gathering: Liliana Vess

I am working on a personal project. I have been reading the magic the gathering series for a while now. I love the planeswalker series and have been wanting to do something like this for awhile.

http://magic.wizards.com/en/articles/columns/magic-story

I finished reading the ELDRITCH MOON and was inspired to model and create the battle scene and was also inspired by the trailer they made (https://www.youtube.com/watch?v=NCbhisqd_co&t=5s).

I want to create a Cutscene and potentially a little VR game. I am working on with Unreal and working on learning how to use the Matinee and Cinematics plus the cascade and effects tools.

I am modeling with the goal of using Unreal Matinee as my "render engine" and the potential for a game as 2nd priority.

So far I have Liliana modeled out. I modeled the clothes and had the UV's set before going into Zbrush.


I used Zbrush to get the diffuse textures and base colors out and I used Substance painter to bake out the normal and Xnormal for a detailed height and Ao.  With the Awesome marmoset Toolbag 3 I setup all of the materials and prep the main model to send to Unreal. I setup the Emission/Glow map and will setup a material blueprint to turn on and off when she uses an ability.

As for the Rigging and Animaitons I started using Rapid Rig (https://www.highend3d.com/maya/script/rapid-rig-modular-procedural-auto-rig-for-maya) but if I can get Unreal's rigging tools to work then I will use that one instead. (https://docs.unrealengine.com/latest/INT/Engine/Content/Tools/MayaRiggingTool/) The Dress skirts and cape will be Physx Cloth


The Environment is at semi setup. For the battle cutscene I plan on having her do a waltz around the graveyard pulling up the zombie to act as body guards or shredder fauder as she fights off the werewolves and eldritch monsters.

I have also started the creature modeling as well. I am going to have 3 different versions of a Basic Zombie, I want to use these as the crowd/horde that act.


3 Different Elite Zombie, these ones will have weapon, a Swords, Spears and I am not sure about the 3rd weapon would be, I am thinking about crossbow but not sure.


I have 3 Different Enemy Werewolves, From left to right its Fast Mid Heavy. For coloring I plan to have a Fast Gray, Medium Brown and Heavy Black.  I want the variety and not have a simple cookie cutter model and just place the same model with different textures.

I still want to model some Eldritch monsters and Emrakul

Friday, February 20, 2015

Madame Mirage


I am working on Madame Mirage from Paul Dini (Author), Kenneth Rocafort (Illustrator). Awsome story, I read it last year and was hoping to see a Mirage Game after Darkness.


 A turnaround of the model, a simple and clean sculpt. I am going to be using her for simple animations and so I can improve my particle and hand animation skills again
Nothing to extravagant. This is stills has the Sculpt hair I used as my reference; I use an insert multiple mesh tool the make the strips for the low game hair. I don't want to use Fibers for this one; I plan of using NCloth and am not sure if my little computer can handle rendering the fibers and the NCloth.


An early Marmoset scene. I am still working on the extra people in the scene and laying out the environment and lighting to get the best views. Planned on this for valentines but life and time took precedence.


And I have been getting re-acquainted with the Animators Survival Kit and have made a simple sexy walk in Maya. I have half the dress as Ncloth; still have to go through and fix the last frames so they blend a little more seamlessly and her legs snaps a little too much for my liking.


Friday, January 2, 2015

2014 Review, What to do for 2015

Another Year to Review. I look over what I have done and completed every year so I know what I must work on for the year ahead. First I need to see what my check list for the start of the year 2014 was.
  • continue to work on human figure 

This is one of this things that is a continuing saga. I will always be improving my figure and muscular understanding of the human body. Realistic or in a style, fantasy direction. It think the Lonely Love 2.0 (Wolf Head Piece) is the highlight of the year as my anatomy project.

  • More hardsurface characters: Robots, Hardsurface, Fantasy Armor, 

I don't really have hardsurface so much as I do Fashion and studying clothing in multiple ways. How other people dress characters, combinations of hardsurface and clothing, what fashions appeal to me and why do I find them interesting. Breaking down the fashion mixing; how to sculpt and understand the stitching of clothes is general. No real High points I think; I am still working on my overall understanding of fashion

  • Improve my rendering outside of Zbrush: Mental Ray, Softimage, 
 This is purely because of Marmoset Toolbag 2and it is a great render tool and really affordable. I just wish they would hurry up and have an animation import option but I think they have the unity input for that low point in their software. I am working on my animation as a side note and need to look into renderings within the new Maya 2015. So this is still one I am improving but its not so much as rendering as it is understanding good lighting and correcting the software as you go along. 
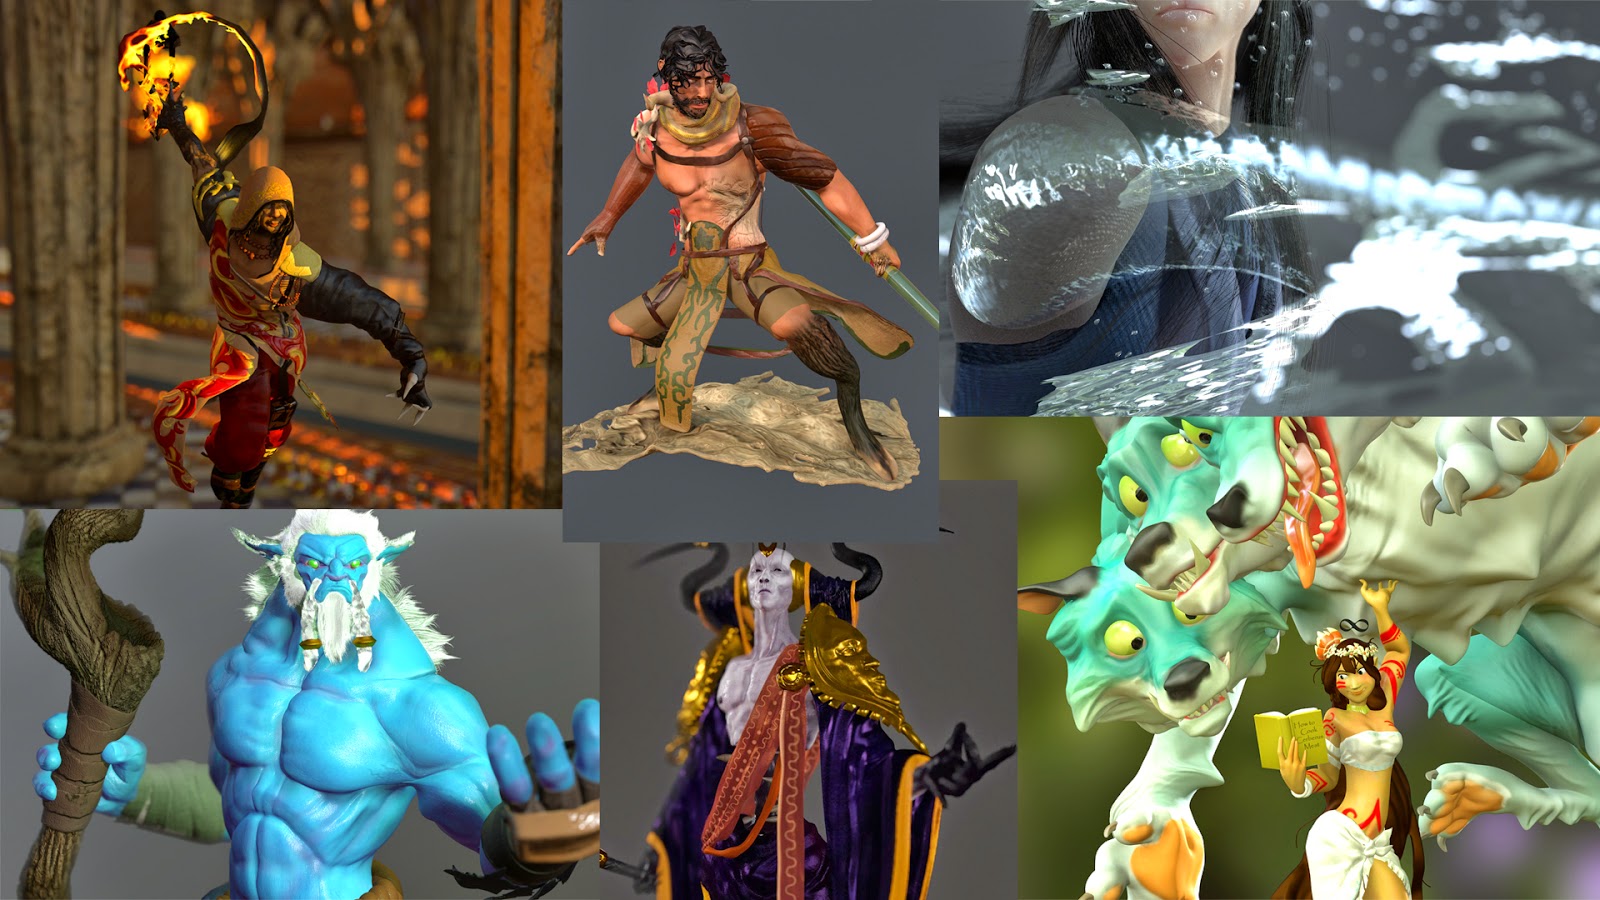
High points Virgo Magi (top left) the lighting in the environment and the character pose are all things I am proud of and Ming Hua (top right) the details in the face and body have been an exciting challenge and will always yet and still need to be improved

  • More time on the low models: retypo's and more alpha modeling.
All of these models are lower versions from game to animation friendly models. I like to think I have improved from last year but I have been spending more time on individual models and don't have a large amount and assessing which model I would like to possibly animate or make a lower game model to challenge myself with.
  • continue drawing and sketching concepts; have a more finished concept before modeling it. 
I have been more character focused (obliviously being a character artist), spending more time sketching and working on rough ideas that come to mind but the large amount of time has been on characters that I am working on or ones that I know I am going to model.
  • More Quad animals less Bipeds and more alien designs; others concept and mine
 Can't say I have anything that will truly fit this category. I am thinking about working on a Realistic Pokemon cause its 1. someone else s design (always something to work on since I will almost never get to use my own concepts in a production) 2.practice animal anatomy within a fantasy style and 3. more real world driven texture maps.
  • Work more with other peoples concepts
Batman by Daniel Arya 
(Not in image my apologies)Steam Cat concept by Brandon Liao
The Little Prince Redesign by c2ndy2c1d
Erebos The God of Dead by Peter Mohrbacher
Soothsayer by Baldi Konijn
Strength by Genevieve Tsai 
Bipolar Real Monster by Toby Allen
League of Legends Azir based model
Ming Hua from The Legend of Korra
(I tried to get all of the models I have worked on based on other peoples art and concepts listed or in the image if I missed one that is not mentioned or seen I am sorry)
I think all of these have turned out good and each have their high points as well as their own low points
 -----------------------------------------------------------------------------------------------------------
So 2015 I need to work on:
  • Anatomy and Muscles groups; always, but more creatures and monster driven with human elements included.
  • Fashion, more clothes and styles that illustrate a time period (i.e ancient Rome vs Victorian England). How to dress characters in a unique world
  • Animation, I have a few scene I would like to work on I won't list them all here but it is something I would like to improve. Animation is not the hard part, like sculpting its all in reference, break down and understanding, I keep having a hard time with making functional rig that will work with my characters.
  • Lighting and Environment modeling, both go hand in hand. I don't have any final versions I can show yet but these go with my animation projects.
  • More Low models to animate and pose with; always adds to working on texture maps for games and movies
  • Always drawing and sketching however small
  • Always model concepts that inspire me, with the artist permissions of course. Good practice and something that I can always help me push myself. 

League of Legends Contest: Plauge Azir

So I have Polycount account and am throwing myself into contests and monthly challenges to help push myself in my techniques and time management skills.

I am taking part in the League of Legends challenge. I choose to work on a new skin for Azir, he is a newer character and there aren't a lot of skins for him so far. I wanted to do a steampunk direction to match with some of the other character skins or a Knights of the round table Middle ages approach.

Here were the rules for Character models

Mission: Create a fully-textured character model of your favorite League of Legends champion/skin
  • Take any champion in LoL and create a high-poly sculpt (optional) and low-poly fully textured model
Things to keep in mind
  • There are no hard limits on polycounts but efficiency is appreciated: use your best judgment and make every polygon count
  • Bake the Ambient Occlusion (AO) map and use this as the start of your Diffuse Map
  • Try to keep the texture on its own single 2048 diffuse sheet
  • You can recreate the base champion, an existing skin or create your own design.
What to deliver
  • Beauty shot of the high poly sculpt (high resolution) at angles that will best show the quality of your asset (Optional if you created a high poly sculpt)
  • Beauty shot of the low poly model (high resolution) at angles that will best show the quality of your asset
    • Texture with flat lighting on, as found in League of Legends (LoL)
  • Composite shot of your character over the updated Summoner’s Rift map (3/4 view)
    • The goal is to see your character in context to the environments found in LoL while being mindful of the design requirements of the MOBA genre
  • A construction shot (high resolution) which should include the following:
    • Wireframe of the low poly model w/ polycounts
    • Texture Sheet showing a good demonstration of economical UV space
    • Any reference and/or sketches that illustrate your thought process


 First rule is Google it and find images for reference.


 I study the character looking at key parts and areas that make this character unique, things areas I like and points that need to be carried over, like the original skin and the alien skin how they are alike and not.
 This is a "Naked" Azir I Sketched a base to work on and from.
 These are the skin concepts I worked on I really liked to way the Plague design was going and I was inspired to do a steampunk/Victorian style something.

 Early model Zbrush Sculpt started from my Human male alpha.

 Low model, worked on the staff
 Rough posing to see where I need to fix the topology and working on texture map. Now it took me about a good week and a half to get to this point.


The Contest final submission required a few things.
 Beauty shot of the high poly sculpt (high resolution) at angles that will best show the quality of your asset (Optional if you created a high poly sculpt)


  • Beauty shot of the low poly model (high resolution) at angles that will best show the quality of your asset
    • Texture with flat lighting on, as found in League of Legends (LoL)


  • Composite shot of your character over the updated Summoner’s Rift map (3/4 view)
    • The goal is to see your character in context to the environments found in LoL while being mindful of the design requirements of the MOBA genre


  • A construction shot (high resolution) which should include the following:
    • Wireframe of the low poly model w/ polycounts
    • Texture Sheet showing a good demonstration of economical UV space
    • Any reference and/or sketches that illustrate your thought process

     Even if I don't get anything from this contest it was a lot of fun and my Photoshop skill were greatly improved. And I think he turned out pretty well.
     

    Saturday, November 22, 2014

    Ming Hua Beauty Shots


     Beauty Renders of Ming Hua. I used a pose from 
    Book 3 episode 8 of Legend of Korra as reference.


    Wednesday, November 5, 2014

    The Soothsayer

    So I have joined polycount forums and am doing some of the contests and monthly challenges. This is the Soothsayer, Concept by BALDI KONIJN (http://www.baldi-konijn.com/)

     Here is my attempt at the October challenge. I aimed for a cinematic version of the Soothsayer: custscene stylized hyper-realism (think that's an oxymoron) I was inspired by the League of Legends trailer and wanted to aim for the level of quality. 32k Triangles give or take and 4096 Maps


     This is where model was after 6 days of actually working.
    I spent most of my time working on his rib cage and neck to get those to really match the concept. I looked at a cat rib cage for reference on stomach and lower rib cage area. I like to model and sculpt some basic hair to help see the characters features as I sculpt. The sculpted hair depending on how I use the character I will pose with the model and use it as a guide for when I create a fibermesh.

    Facial Evolution
    I thought about having fingernails on his hand but when I looked at the concept he didn't really have anything of the kind to speak of so I left them out of the final model.

    Here is the final sculpt of the Soothsayer sans the hair and post posing. I used a combo of Surface masking and alpha maps I made to work on various areas of the body and clothing.

     The staff is surface mapped and sculpted cracks to define areas to match the concept. I made a simple insert mesh brush for the feather and made about 5 different sculpted versions of the same feather and placed around the kilt and arm. The white eyes are the shine and will be transparent when I do a beauty render
    I have the Body as one UV map with the toe nails and eyes. The Clothing, Belts, Wraps etc are on another. I have the Staff as its own map, I did not want to lose any detail in the wood.


    I posed the model and all parts in Zbrush. Once posed I do fibermesh last. I brush the hairs to match my sculpted version for a rough base and them start moving individual strands for more odd hair hanging out and spike areas to the match the concept. I made a simple plan for a base and threw some grass on there.


    I exported the model to Marmoset and here is where the model is so far. Still lots to do and fix. The sash and stones are funky for some reason. I still need to UV the ground and rocks. I am also still working on the soul/ghost goo.